ClearlyIP’s Tips and Tricks
Troubleshooting Tools
When it comes to remotely assisting customers and end-users we might need to have all the available resources to troubleshoot any issue and therefore pinpoint the root cause, and for doing so we need to gather all the pertinent information from where a problematic call takes place.
Sometimes we focus on the IP-PBX, or the network or the router, etc, but this time we will focus on the entity that actually interacts with the end-user: the IP-phone (or IP-Terminal).
Our line of IP-Phones comes with at least five helpful tools that will let us see things the same way the end-user does. Today we will talk about two of them: PCAP Feature and LCD Screen
The Pcap Feature tool is very helpful when debugging issues with signaling at the phone’s level. It helps us visualize what is happening inside the phone, what packets is the phone receiving from the IP-PBX, and what is the phone sending back in terms of SIP signaling.
To access these tools you need to go o the phone’s Web UI and navigate to ‘Management -> Tools’
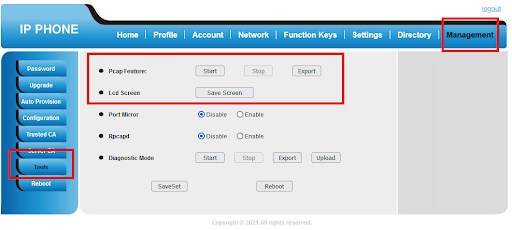
To get a PCAP file from the phone follow these steps:
- In the ‘Pcap Feature’ section press ‘Start’.
- Reproduce the issue. This means, make or receive a call.
- Press ‘Stop’
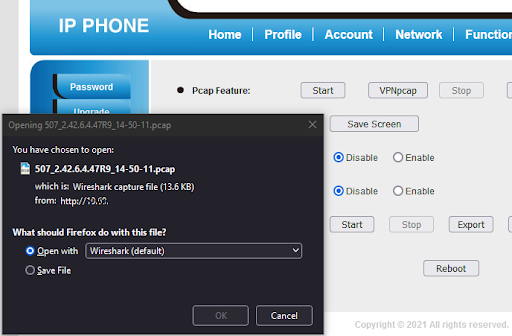
- Then press ‘Export’ to download the PCAP trace.

This will allow you to download the PCAP file to your computer and then use a third-party program to open it and analyze it.
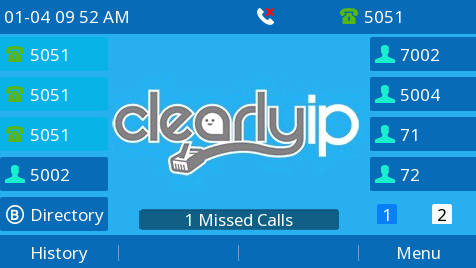
The LCD Screen allows you to take a screenshot from the phone’s LCD. To do this simply click on ‘Save Screen’ and then download or open the image.
In the following example, we are taking a screenshot when the user presses the button with the Check Mark icon twice.


And finally, this is an example shown in the screenshot of the ‘Missed calls’ message in the phone’s LCD.