ClearlyIP’s Tips and Tricks
In this case, we will discuss the role of permissions in Clearly Cloud. As you may notice in our Knowledgebase, there is a section for this and it is described here:
https://kb.clearlyip.com/ClearlyCloudPBX/Client-Level.html#Permissions
Let’s start with an example:
Let’s say we have the following request from one of our customers: ‘How do I give someone access to another VoiceMail mailbox and view it in Call Panel?’
The first thing to do is to log in as “Client” in Clearly Cloud and then go to “Permissions”.
In this section we will add a new Permission by just clicking on the “Add Permission” button and the following screen will emerge.
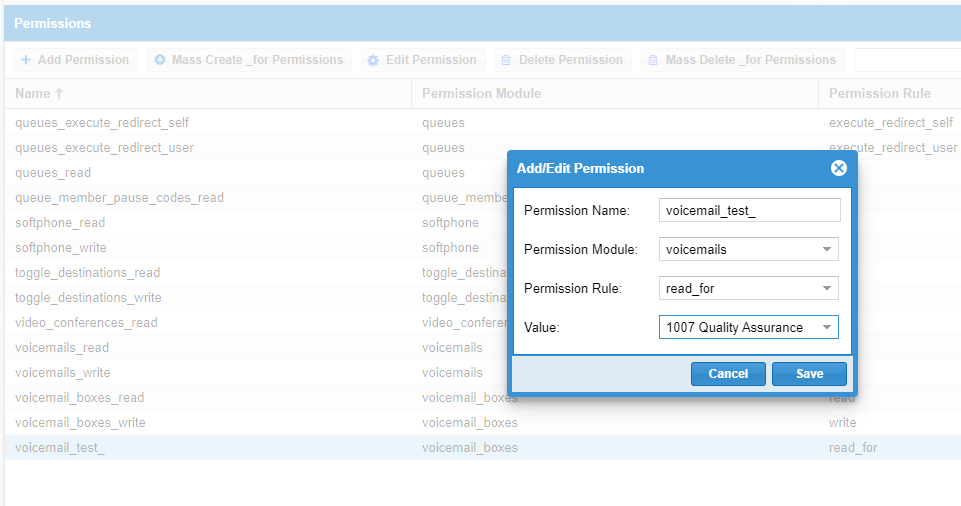
In this case we are going to create a Permission for “reading” the Voicemails from extension 1007 in extension 1002.
The steps for creating this rule are as follows:
- Give the Permission a name. In this example the name will be voicemail_test_
- Select the Permissions Module. In this case it will be voicemails.
- Set the rule as “read_for”,
- And the value will be extension 1007- Quality Assurance.
- Finally, click on Save.
Now, in the “Users” menu, click on the extension/user that will be allowed to monitor the voicemail of the target extension. In our case it will be extension 1002.
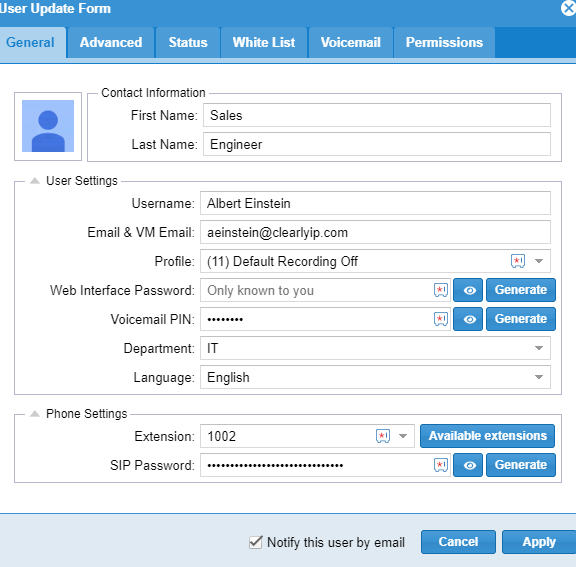
Click on the “Permissions” tab and you will see there is an available permission with the name we just created. Select the permission and use the arrows to move it into the “Selected” area.

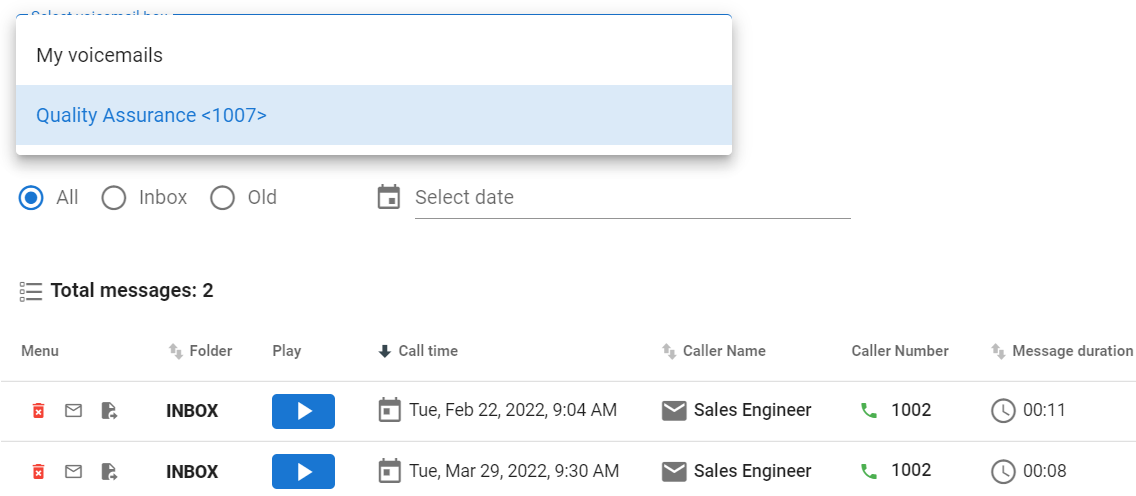
If you log into Call Panel with the extension’s 1002 credentials you will see under the Voicemail meny a drop-down menu from which you can select the voicemails for extension 1002 or 1007.